Encoding issues. Solutions for linux and within Java apps.

Puh, encoding! Did you ever have trouble with it? No? You must be a lucky guy!

Even none-developers should have problems with it e.g. if they use different operating systems.

What is encoding? And what’s so difficult with the encoding?

First encoding (better: character encoding) defines how characters have to be saved to be displayed correctly in your editor or look at the wikipedia definition to be correct. Update: here is a nice introduction.

For example if your editor only reads ASCII files all is very simple: it will use every 8 bits of the bitstream to get a number. Then it will interpret this number according to the ASCII-table. So, if it finds a 97 (this is 0x61 in hexadecimal) it prints ‘a’.

(BTW: look at this nice ASCII-art.)

But what if the encoding is another one? Or if even the bitstream should be splitted into 16-bits-packages instead of 8-bits-packages?

Then the user won’t see the correct information!

Second: On linux everything is in UTF-8. Windows uses CP 1252. and so on. Not good!

(With everything I means: clipboard, default file encoding, …)

How can you (as an end user) handle this under linux?

There are at least 4 programs that helps you with encoding issues under linux:

  • There are command line utilities in linux where you can determine automatically the encoding of a file: enconv and enca or open the file in firefox and go to View -> Encoding and view the detected encoding!
  • To change the encoding of file-content the editor kate is really great:
    Go to extras -> encoding and try it out.
  • Change the encoding of the content of several files which come from windows and you want to have them in linux then use recode:
    recode CP1252..UTF-8 *
    recode ISO-8859-1..UTF-8 *

    do the following to backup the original files:

    mkdir test && cp * test/ && cd test
  • Another command line utility is iconv (or here)
  • Change the encoding of the filenames with convmv (files e.g. from windows).
    To preview the change do:

    convmv -f cp1252 -t utf8 *

    To do the change:

    convmv --notest -f cp1252 -t utf8 *

How does Java handle encoding?

Java is platform independent one should think, but it isn’t regarding to the encoding.

For example: if you read a file correctly under linux, this could fail if you don’t specify the encoding explicitly, because it assumes it is utf8 and under windows it will use another default!

To override the default use: ‘java -Dfile,encoding=UTF-8’ or be explicit with the encoding! E.g read characters from a stream with the following lines:

BufferedInputStream iStream = new BufferedInputStream(urlConn.getInputStream());
InputStreamReader reader = new InputStreamReader(iStream, "UTF-8");

Another issue could be Java source files. They can have different encoding. You should use UTF8, because this is the encoding Java uses for its Strings.

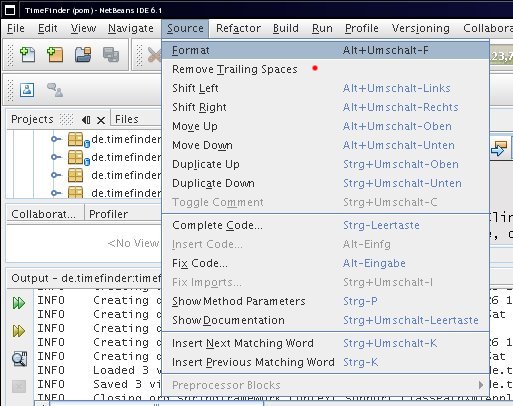
In NetBeans 6.1 change it in the project properties (right-click on the project->properties)->Source->Encoding

In Eclipse 3.4 go to the preferences (menu Window) -> General ->Workspace->text file encoding

But this is only useful for desktop applications like my open source timetabler. But what if you do web development? All fine there? No not really. Then you might get additional problems with url encoding or xml parsing. For the latter one the fix is simple:

  • XML: <?xml version=”1.0″ encoding=”UTF-8″?>

But for url encoding the following does not really work:

  • JSP: <%@page contentType=”text/html; charset=UTF-8″ language=”java”%>

Apropos JSP – I had an encoding issue with the request. Try the following:

<% out.print(“RESPONSE character encoding=” + response.getCharacterEncoding() + ” “);
out.print(“REQUEST character encoding=” + request.getCharacterEncoding() + ” “);
out.print(“JVM encoding ” + System.getProperty(“file.encoding”) + ” “);

//EVEN here we get request parameter in wrong encoding
bean.setRequest(request);
%>

You will see that the request is null if I am not wrong. And then Java will use utf8? NO!

It will use ISO-8859-1! Why? It is written in the standard!

A simple request.setCharacterEncoding(“UTF-8”); would help if all browsers would send its request according to the header of the jsp. But this isn’t actually working for my use case. So I grabbed the strings from the request via this helper method:

private String toUTF8(String str) {
        try {
            return new String(str.getBytes("8859_1"), "UTF8");
        } catch (UnsupportedEncodingException ex) {
            return str;
        }
}

Update 1: Read this or this to get a better workaround with a javax.servlet.Filter, webserver parameters and jsp configs.

Update 2: The following snippets could be useful if you are using maven and want to make the application UTF-8 aware:

<plugin>
<artifactId>maven-compiler-plugin</artifactId>
<configuration>
<source>1.6</source>
<target>1.6</target>
<encoding>UTF-8</encoding>
</configuration>
</plugin>

<plugin>
<groupId>org.apache.maven.plugins</groupId>
<artifactId>maven-resources-plugin</artifactId>
<configuration>
<encoding>UTF-8</encoding>
</configuration>
</plugin>

Update 3:

A good side with a lookup table for Unicode characters

http://unicode.coeurlumiere.com/

Summary

I invite you to post all your experiences with encoding problems in java.
E.g. how to force jboss or jetty to use utf8?

Canon ip 4200 under linux

My experiences under linux with the canon printer are great. Installation works like it is described in the manual for Suse 10.0 (I tried it only for 10.1).

One strange thing you have to know under linux, if you refilled the printer. The printer will stop printing if it was refilled. One button of the printer will blink, which normally indicates missing paper, so I was confused that pressing on the button does not help. So, what was wrong?

You have to press the button a long time (5 seconds or so). This way Canon makes sure you read the message (which will pop up under windows only) and you confirm that you will lost the warranty with that action.

Nice, isn’t it? Hmmh …

The installation of your canon ip4200 printer under kubuntu 8.04.1

looks like described here.

I will try to translate it into English now:

  • Download the tar file (with rpms) from this site.
  • sudo alien -c cnijfilter-common-2.60-1.i386.rpm cnijfilter-ip4200-2.60-1.i386.rpm
    You should get the following info:
    “cnijfilter-common_2.60-2_i386.deb generated
    cnijfilter-ip4200_2.60-2_i386.deb generated”
  • Now install the transformed packages:
    sudo dpkg -i cnijfilter-common_2.60-2_i386.deb
    sudo dpkg -i cnijfilter-ip4200_2.60-2_i386.deb
  • Restarting cups should give you an okay:
    sudo /etc/init.d/cupsys restart
  • The driver file is located at: /usr/share/cups/model/canonip4200.ppd
    Specify this while configuring your printer in KMenu->Systemeinstellungen (Systemproperties?)->Printer
    Define it as standard printer
  • Now you can install an additional program to see more details of your printer:
    sudo apt-get install escputil

The clue about this installation is that you have more options in resolution and color models than in Suse 10.1

Kubuntu 8.04.1 not only for Java Developers

Today I switched from Suse 10.1 to Ubuntu 8.04.1 because of the smoother upgrading mechanism of debian. All people who already knows ubuntu won’t learn sth. from this post, so don’t waste your time 😉

Now all seems to work what I need as a ‘normal’ user:

  • mp3, just start amarok and install the necessary packages
    To install the ability that you can burn mp3 files with k3b do

    sudo apt-get install libk3b2-mp3
  • dvd, just start kaffeine and run the provided script in the console.
  • 3d + desktop effects. To enable your 3d graphic card click the hardware info and make the propriatary 3d-support active. Thats it. Ubuntu will do the rest for you. The same is true for the desktop effects. Go to the K-Menu->System->Desktop Effects and install it.
  • skype: add the following line to the file /etc/apt/sources.list
    deb http://download.skype.com/linux/repos/debian/ stable non-free
    and do
    sudo apt-get install skype
  • If you need an import/export tool for thunderbird then try this.
  • flash with
    
    sudo apt-get install flashplugin-nonfree
  • grip to grab your cds, inkscape for your svg images, gimp for other images, kgpg to encrypt sth.,

The only real problem was that thunderbird and firefox have some problems with the layout. And be sure that you DO NOT use the provided thunderbird 2.0.0.16 because it does not work with lightning. Download 2.0.0.14 and get lighning 0.8.

Now we will go on to install things that we need as Java-developers. All is very simple and straightfoward:

Install Java 1.6

sudo apt-get install sun-java6-jdk
sudo update-java-alternatives -s java-6-sun

To set open jdk as the default use ‘update-java-alternatives -s java-6-openjdk’. Use ‘update-java-alternatives -l’ to list the installed jvms. Or use:

sudo update-alternatives –config javac
sudo update-alternatives –config java

Install NetBeans 6.1

Via https://help.ubuntu.com/community/Netbeans

or install NetBeans 6.0.1 more easily via:

sudo apt-get install netbeans

I had trouble to start NetBeans with sun-java5-jdk, even with the next procedure where I installed the very latest version. Download the .bin file directly from sun and convert it into .deb via:

sudo apt-get install java-package
sudo apt-get install fakeroot
fakeroot make-jpkg jdk-1_5_0_16-linux-i586.bin

A lot of warnings will appear. But as a result you should get the .deb file and do:

sudo dpkg -i sun-j2sdk1.5_1.5.0+update16_i386.deb

It will install the java not in /usr/lib/jvm but in /usr/lib/j2sdk1.5-sun/

Now you should be able to start netbeans with jdk5:
/home/user/netbeans-6.1/bin/netbeans --jdkhome /usr/lib/j2sdk1.5-sun --fontsize 14
But the problem is that I do not see the window content as with sun-java5-jdk ...

Install Eclipse 3.4

http://jhcore.com/2008/06/26/eclipse-34-ganymede-on-ubuntu/

or install Eclipse 3.2 via:

sudo apt-get install eclipse

Other things you can install: kdesvn, kdevelop, ..., extremetuxracer ;-)

For interested users I will post here the menu.lst for my semi-complicated OS
and disc constellation. Maybe it will be usefull for others.

I have two hard discs:
# device.map
(hd0)   /dev/sda
(hd1)   /dev/sdb

My system boots from the sata disc (sda) and can start the old suse on sda
and the new system on sdb (an ide disc).
It would have been very tricky to figure out how I can start windows which is located at sda,
but all the stuff was done from kubuntu! I don't know how, but it is great.
To install the menu list do sudo grub-install /dev/sdb

One question to my reader: were can I get the UUID?

# Now menu.lst
## default num
# Set the default entry to the entry number NUM. Numbering starts from 0, and
# the entry number 0 is the default if the command is not used.
default         0

## timeout sec
# Set a timeout, in SEC seconds, before automatically booting the default entry
# (normally the first entry defined).
timeout         7

title           Ubuntu 8.04.1, kernel 2.6.24-19-generic
root            (hd1,5)
kernel          /boot/vmlinuz-2.6.24-19-generic root=UUID=3fce55c4-6d4f-4d88-b947-483acce2e7ee ro quiet splash
initrd          /boot/initrd.img-2.6.24-19-generic
quiet

title           Ubuntu 8.04.1, kernel 2.6.24-19-generic (recovery mode)
root            (hd1,5)
kernel          /boot/vmlinuz-2.6.24-19-generic root=UUID=3fce55c4-6d4f-4d88-b947-483acce2e7ee ro single
initrd          /boot/initrd.img-2.6.24-19-generic

title           Ubuntu 8.04.1, memtest86+
root            (hd1,5)
kernel          /boot/memtest86+.bin
quiet

### END DEBIAN AUTOMAGIC KERNELS LIST

# This is a divider, added to separate the menu items below from the Debian
# ones.
title           Other operating systems:
root

# This entry automatically added by the Debian installer for an existing
# linux installation on /dev/sda1.
title           SUSE Linux 10.1 (on /dev/sda1)
root            (hd0,0)
kernel          /boot/vmlinuz root=/dev/sda1 vga=0x31a resume=/dev/sda5 splash=silent showopts
initrd          /boot/initrd
savedefault
boot

# This entry automatically added by the Debian installer for an existing
# linux installation on /dev/sda1.
title           Failsafe -- SUSE Linux 10.1 (on /dev/sda1)
root            (hd0,0)
kernel          /boot/vmlinuz root=/dev/sda1 vga=normal showopts ide=nodma apm=off acpi=off noresume nosmp noapic maxcpus=0 edd=off 3
initrd          /boot/initrd
savedefault
boot

# This entry automatically added by the Debian installer for a non-linux OS
# on /dev/sdb3
title           Microsoft Windows XP Professional
root            (hd1,2)
savedefault
makeactive
map             (hd0) (hd1)
map             (hd1) (hd0)
chainloader     +1

Why NetBeans?

Today it is time to summarize my experience with NetBeans. I am a user since version 3 (was it 3.4?) and my personal requirements increase not so dramatically like the features does in NetBeans. And so I am still a happy user.

I am not a jee developer so I can’t cover topics like JSF support, ruby or other ‘non-desktop’ features of NetBeans. For all features of the latest version please read this document.

The next points will be

My favorite features in NetBeans 6.1

  1. NetBeans is free, open source, platform independent and stable.
    There are several IDEs on the market, but Eclipse and NetBeans are open source and so they have the best price 😉
    In comparison to Eclipse NetBeans was and is ‘really’ platform independent. That means you can use the same files for windows and Linux. But that’s not all: all platforms has the same support (unlike Eclipse e.g. for Mac OS).
    The latter point (‘stable’) is not true for the early milestones. My experiences with them were really bad, but e.g. the latest version 6.1 with all updates is very mature. I use it every day without a crash so far (although memory consumption is higher compared to previous versions)
  2. NetBeans is easy.
    NetBeans is easy to install and to use. There are several download-bundles so that you don’t need to go into the plugin hell, like in other IDEs. Simply download e.g. the Java-bundle and get the rest later through the plugin manager (Tools->Plugins). The NetBeans folks offer even a version for php development, where you can debug the code! (I tried it and it works under my suse linux, but the installation procedure was ugly…)
    All common actions have a keyboard shortcut or you can create one easily. Even for your ant tasks: Just click on the node which is on the left of the build.xml file (in the files window) and right click on a task. Then ‘create shortcut’. That’s it.
    NetBeans is easy for common tasks like

    • Editing
      I think the most important feature of all IDEs is code completion. In NetBeans you can do this via CTRL+SPACE. This will complete a variable, class or method name for you. One great example is to place the cursor after
      new JFrame().addKeyListener(new Key
      and select KeyListener. This will implement the listener automatically for you.
      With NetBeans 6.0 they introduced some code quality hints: if a variable is unused, if a method should be annotated, … To perform the actions associated with the hints (a yellow bulb on the left side) just click ALT+ENTER.
      Other editing-features are: formatting xml or Java sources via ALT+SHIFT+F, fix/organize imports via CTRL+SHIFT+I, create setters and getters via ALT+INSERT, SHIFT+F10 for context menu, maximizing the editor with SHIFT+ESC, jumping to another source code (CTRL+click a method or another object; CTRL+PageUp or Down), open any file with SHIFT+ALT+O
    • Refactoring
      rename of methods, classes via CTRL+R. Change method parameters etc.
      Try it via right click into a Java source and go to Refactor.
    • Running
      just hit F6 … and choose the main application before (right click on the project->main application)
    • Debugging
      hit CTRL+F5 to start debugging. To see the value of a variable hold the mouse over it. You can even evaluate expressions: select the expression with the mouse and hold the mouse over the selection. Or the old way: go to the Watches-Window and add the expression as ‘New Watch’. Even in this ‘add-watches’ text field you can use code completion! With this feature you can change the content of a variable easily. Warning: evaluate only expression without side effects, because otherwise the evaluation will change your variables!!
      Another feature will help those people where the application startup is expensive:
      (slightly) change the code and then go to the Run-menu->Apply Code Changes and continue with the changed code.
      Conditional breakpoints are available via right clicking on the ‘breakpoint rectangle’->breakpoint->customize. Then write any expression into the enabled line for ‘conditions’.
    • Web-start-enabling
      right click on the Java-project, then properties->Application->Web Start. The last time I used this it was a bit tricky to get it working…
    • Packaging
      just hit SHIFT+F11 or clean and build to get a jar file (which is usable via ‘java -jar’) and the other libs in the dist folder.
  3. NetBeans has a lot of plugins.
    Okay, there are a lot more plugins for Eclipse, right. Right at the moment 😉
    The NetBeans community has some really cool plugins e.g. if you didn’t download the full bundle you can add the plugins easily via: Tools->Plugins. And they will work! I never failed to install a plugin. In Eclipse this was not always true.
    You should try the following plugins:

    • With the UML plugin you can create several types of diagrams. E.g. class diagrams. For those diagrams NetBeans offers a way to create them from the Java-source-files automatically.
    • Mobility plugin. Some times ago I developed mobidic (a mobile dictionary) and this even without ever having a smart Java-enabled mobile phone (using the emulator). Then I deployed the created files to a friend with such a mobile and … it worked!
      It is even possible to debug directly on the device (not only in the emulator). Read this.
    • The sqe plugin includes such great tools like findbugs, checkstyle and pmd to enhance you code quality. Go to this page to see how to install it in NetBeans.
      FindBugs is really nice, please try it and I am sure it will lead you to (at least) one bug.
    • For my TimeFinder project I use Spring Rich Client. Then I noticed that NetBeans could help even there with the Spring Rich Client plugin.
    • The Java Application framework support is a smaller project, but well integrated in NetBeans where you can easily create a desktop application (status bar, progress monitor, actions, …) within minutes. Just create a Java project and choose ‘Java Desktop Application’.
  4. NetBeans has good JUnit support.
    Default testing environment in NetBeans was and is JUnit (supported versions are 4.1 or 3.8). You can create a template JUnit-file via right clicking on the Java file->Tools->Create JUnit Tests or CTRL+SHIFT+U. I know that you should create the test before the class, but you should create the empty methods to let NetBeans create the test for you. After that write the test and make them passing (This is the way I go). NetBeans offers a nice UI to show the errors and passed tests. Click on the errors and NetBeans will guide you to the source code.
  5. NetBeans has a Java Profiler.
    Compared to Eclipse’s profiler the NetBeans profiler is faster and easier to setup (one click! really!). E.g. for a very simple project Eclipse’s profiler (within its standard settings) took 1 minute and 4 seconds. Where NetBeans profiler was ready within 4 seconds (nearly the normal execution time). I don’t want to talk about the time it requires to setup the TPTP stuff in Eclipse. The profiler for NetBeans comes with the standard Java-bundle so really no setup procedure. (To be fair: Eclipse’s profiler will be usable after some configuration.)
    With NetBeans 6.0 they introduced a new concept of profiler points, where you can define points in the source code where the profiler should do some actions (take snapshot, clear results, …). Read this for more details.
  6. NetBeans has good maven support.
    I didn’t try other IDEs with maven. In NetBeans you have to download the maven2 plugin then you will have a lot of features:

    • You can directly open any maven project. The pom.xml will be the project descriptor. So a change there will be visible in NetBeans after one second or so. E.g. if you add a new library you will see the added library in the Library node of the project window.
    • The main goals are accessible through keyboard short cuts or via mouse clicks as every other NetBeans project (clean, build, debug, run, test, javadoc)
    • ALT+ENTER on a missing class will ask if you want to search it in a maven repository and if it was found it will automatically add it to your pom.
    • A maven repository browser: Window->’maven repository browser’.
  7. NetBeans has other cool gimmicks
    • Subversion, Cvs and mercurial support; creating or applying patches etc. I personally prefer KdeSVN in combination with NetBeans subversion support.
    • Local history is a new feature introduced in 6.0. It its very handy to redo things that I changed the last week without having access to the underlying subversion – great!
    • You can create an HTML file from a Java source file (with correct highlighting). Go to File menu and click on “Print to HTML”.
    • Your translated project is just a few clicks away: Tools->Internationalization->Internationalization Wizard
    • You want to run your project with different startup parameter? Right click the project->Set Configuration->Customize.
    • Create a license header automatically for every file. (Please ask me if you need an English translation.)
    • To compare two versioned or unversioned files: select them and right click->Tools->Diff

NetBeans is not perfect

(Of course, that’s true for almost all software products)

At the moment NetBeans 6.1 does not offer:

  • An incremental compiler like in Eclipse (this will come with 6.5! and will be called compile on save)
  • A spell checker like in Eclipse
  • TestNG. This is very easy to setup in Eclipse and the hell in NetBeans.
  • Subversion client – you have to install your own command line version first.
  • Formatting of several files. E.g. via right clicking on a package->Tools->Formatting.
  • Searching through keyboard shortcuts
  • Select only some modules for the update process
  • Collect closed documents in a ‘trash’ (like in opera)
  • The collaboration plugin (Real time editing) is far from perfect. Read this for more information. Here Eclipse rocks!!

Loading jdk logger properties from classpath

It is not the standard way to load the jdk logger.properties file, but I prefer it! Maybe you know it; maybe not. Here is the easy snippet how I load the jdk logger property from classpath in my TimeFinder project:

// call this method at the very first after main
public static void initLogging() {
try{
LogManager.getLogManager().readConfiguration(Startup.class.getResourceAsStream(“logging.properties”));
} catch (Exception ex) {
ex.printStackTrace();
}}

And here is the logger.properties file. Put it into the same package as the Startup class:
handlers = java.util.logging.ConsoleHandler

# Set the default logging level for the root logger
.level = INFO

# Set the default logging level for new ConsoleHandler instances
java.util.logging.ConsoleHandler.level = ALL

# Set the default logging level for new FileHandler instances
#java.util.logging.FileHandler.level = INFO

# Set the default formatter for new ConsoleHandler instances
java.util.logging.ConsoleHandler.formatter = de.timefinder.core.util.TimeFinderFormatter
#java.util.logging.FileHandler.formatter = de.timefinder.core.util.TimeFinderFormatter

# NOW change the logging messages of the ‘getIcon-package’ to WARNING
org.springframework.richclient.image.DefaultIconSource.level = WARNING

de.timefinder.core.gstpl.ncp.NoCollisionPrinciple.level = FINEST

The most annoying but strangest bug for me in NetBeans is …

Some time ago I developed an QtiPlot or Origin-like application called genvlin with the NetBeans 5.0 platform. Then I discovered a really strange bug under linux with an relative old jdk:

If the user wants to select a menu item e.g. open projects he has to go some menu item below to select this item. It was strange and annoying at the same time, because in NetBeans 5.0 IDE I didn’t see this bug.

Now someone could say: time has changed and no such bug exists in 6.1.

No, thats not true!

Today I discovered exactly the same old and annoying bug in the latest IDE 6.1 (with jdk 1.6.0_06) here I captured a screenshot:

I simulated the mouse pointer with a red dot. In 5.0 it was even worse: the mouse sometimes was several pixels below this point!

I don’t fake it. Believe me! (Does anybody know how to capture screenshot with mouse pointers under linux?) You can trust that I didn’t fake the image, because then I captured another interesting screenshot:

Which might be a solution to the problem: the JPopupMenu (I guess menus are implemented in this manner) is shown at the wrong position.

Has anybody seen the same bug, too??

It is really difficult to reproduce. Sometimes it occures and sometimes not…

E.g. I restarted NetBeans and it disapears.

Please look here for the bug report at netbeans.org.

UPDATE = PARTIAL SOLUTION

Today (19.08.08) it was the first day I see this behaviour in another java application.
(The popupmenu selection was different to the mouse position)
So I guess: its not a netbeans issue!!

UPDATE2

You can stimulate this bug via:

click “restore old size” in the menubar (WindowMaker) of the window of Netbeans -> move the window a bit left (out of screen) -> maximize -> now e.g. right click a project => context menu => bug

Debug your NUnit Tests in VS Express 2005

Today it was a lucky day and I found out how I can make my unit tests working in VS Express 2005.

Normally you can attach the debugger to the nunit-GUI – but not in the Express Version!

This is really annoying. So look here for the workaround.

If you are new to C# it is a little bit different as in Java to create a test case.

You can do the following

  1. Install NUnit
  2. Create a new project with your sources. E.g. call it HelloWorld. (choose Windows Application)
  3. Add a new project with your tests to the solution. E.g. call it HelloWorldTest. Right click the solution and click ‘New Project’ (choose class library)
  4. Then right click HelloWorldTest and ‘Add Reference’. Browse until you find \ProgramFiles\NUnit\bin\nunit.framework.dll
  5. Add some unit test to HelloWorldTest
  6. Apply the mentioned hack above on HelloWorldTest.csproj
  7. Right click HelloWorldTest and click ‘Specify as StartUp Project’
  8. Press F5 and you should see the NUnit-GUI running your test cases. Now you can set breakpoints and evaluate expression in the test class (like you would do in HelloWorld).

Integrate MyDoggy in Spring Rich Client 1.0.0

I did some basic introduction to SpringRC here and here.

Now it is time to leave the basics and hack into the details of the ‘gui architecture’ in Spring RC 1.0.0. So this more technical article is not really important for the ‘normal developer’ – only those who want to integrate its own docking framework.

To see a fully working example in action go to the resource section and load it down 😉

I started the MyDoggy integration to avoid licensing issues with vldocking and jide, which are currently integrated into Spring RC. Another option would be flexdock, but this project is inactive since a long time. It would be great to see the integration of some more docking frameworks. Swing-Docking will be included in SpringRC 1.0.1, see this jira issue for more information.

To use the MyDoggy integration you will need at least Java 5 and the upcoming MyDoggy 1.5.0 (included in the example). This version offers much more features, which won’t be used from my integration.

I simply looked into the source code of vldocking to get started with MyDoggy. This code is located in the spring-rich-client-docking folder. The necessary classes were:

  1. MyDoggyApplicationPage extends AbstractApplicationPage
    From this class we normally have one instance (the JFrame) and we can add views to this page (south, north, …). For MyDoggy we will need only one view, but several Contents (the MyDoggy-term for PageComponent). Those components will have one header, where we can drag & dock them.
  2. MyDoggyApplicationPageFactory implements ApplicationPageFactory
    This class creates one instance of our MyDoggyApplicationPage and loads the layout from the xml file if possible.
  3. MyDoggyPageDescriptor extends MultiViewPageDescriptor
    With this class we can specify properties to create the page. In MyDoggy we will need to specify the xml file here only (as a Resource)

(Please keep in mind: in my implementation the SpringRC’s-specific terms ‘View’ and ‘PageComponent’ have the same meaning and are equivalent to the MyDoggy specifc term ‘Content’)

For all docking frameworks the ApplicationPage is the most important class. For a standalone usage you will create a JFrame and set the special layout manager. For SpringRC you can do this via implementing the following method of the ApplicationPage implementation and return the root component

protected JComponent createControl() {
 rootComponent = new JPanel();
 rootComponent.setLayout(new ExtendedTableLayout(new double[][]{{0, -1, 0}, {0, -1, 0}}));
 rootComponent.add(toolWindowManager, "1,1,");
 return rootComponent;
}

Put the rest of all the initialization (toolWindowManger etc.) in the constructor of ApplicationPage.

If you remove a the root component (normally on an application shudown) you want to save the layout. So, you need to implement the close method

public boolean close() {
  try { saveLayout(); } catch (IOException ex) { }
  return super.close(); }

The entry point to create a PageComponent is

protected void doAddPageComponent(PageComponent pageComponent)

For MyDoggy I added the created Content to the contentManager object.

I don’t know if the following code in doAddPageComponent is necessary, but the comment made it important:

   // trigger the createControl method of the PageComponent, so if a
   // PageComponentListener is added
   // in the createControl method, the componentOpened event is received.
   pageComponent.getControl();

Now we should revert the doAddPageComponent stuff in the following method

protected void doRemovePageComponent(PageComponent pageComponent) {
   contentManager.removeContent(e.getKey()); ... }

As one of the last steps we should inform SpringRC of MyDoggy-specific events like removing (closing a Content)

private class MyDoggyContentListener implements ContentManagerUIListener {
        public boolean contentUIRemoving(ContentManagerUIEvent cmEvent) {
            Content content = cmEvent.getContentUI().getContent();
            PageComponent pc = getPageComponent(content.getId());
            close(pc);
            return false;
        }
        public void contentUIDetached(ContentManagerUIEvent cmEvent) {}    }

Do not forget to register this listener in your docking framework

contentManagerUI.addContentManagerUIListener(new MyDoggyContentListener());

Resources

  • Another older, but very good tutorial is located here.
  • Here you can download the project (12.07.2008) with all the necessary jars. It is a NetBeans 6.1 project, so you can simply copy all spring-rc jars into the lib folder and open the project with NetBeans. Then resolve references via right click or change the references directly; in nbproject/project.properties.

Spring DI via Java configuration. No XML!

In picocontainer you have only one option: configure your beans with pure Java code. Thats what I want. Because it is type safe and all major IDE will easily refactor this code later if necessary.

Then, with nanocontainer, it is even possible to write the configuration code in scripting languages.

In Spring you normally hook up your dependencies in an xml file. This is okay as long as you learn this ‘xml’. So, I looked around if there are alternatives to xml.

Here are the results:

Deploy file to Sourceforge with an ant task

After studying the workaround I can now deploy a file to my sourceforge directory. Now I don’t need to upload the file manually with konqueror’s fish protocol.

Just copy the jsch jar version 0.1.29 (!) to ANT_HOME/lib and use the following ant target.

    <target name="deploy-all" description="deploys timefinder for users and developers" depends="-init-deploy">
        <zip basedir="${basedir}/.."
             destfile="${release.file}"
             compress="true"            
             casesensitive="true"
             duplicate="fail"
             whenempty="fail">
            <patternset refid="pkg-all"/>
        </zip>
        <scp file="${release.file}" todir="${username}:${password}@frs.sourceforge.net:uploads/" />
    </target>      

Now invoke ant via:
ant deploy-all -Dusername=yourusername -Dpassword=yourpassword

Please keep in mind that this is not so secure, because other user could see the password with the unix command ps. See the security notice here.