Encoding issues. Solutions for linux and within Java apps.

Puh, encoding! Did you ever have trouble with it? No? You must be a lucky guy!

Even none-developers should have problems with it e.g. if they use different operating systems.

What is encoding? And what’s so difficult with the encoding?

First encoding (better: character encoding) defines how characters have to be saved to be displayed correctly in your editor or look at the wikipedia definition to be correct. Update: here is a nice introduction.

For example if your editor only reads ASCII files all is very simple: it will use every 8 bits of the bitstream to get a number. Then it will interpret this number according to the ASCII-table. So, if it finds a 97 (this is 0x61 in hexadecimal) it prints ‘a’.

(BTW: look at this nice ASCII-art.)

But what if the encoding is another one? Or if even the bitstream should be splitted into 16-bits-packages instead of 8-bits-packages?

Then the user won’t see the correct information!

Second: On linux everything is in UTF-8. Windows uses CP 1252. and so on. Not good!

(With everything I means: clipboard, default file encoding, …)

How can you (as an end user) handle this under linux?

There are at least 4 programs that helps you with encoding issues under linux:

  • There are command line utilities in linux where you can determine automatically the encoding of a file: enconv and enca or open the file in firefox and go to View -> Encoding and view the detected encoding!
  • To change the encoding of file-content the editor kate is really great:
    Go to extras -> encoding and try it out.
  • Change the encoding of the content of several files which come from windows and you want to have them in linux then use recode:
    recode CP1252..UTF-8 *
    recode ISO-8859-1..UTF-8 *

    do the following to backup the original files:

    mkdir test && cp * test/ && cd test
  • Another command line utility is iconv (or here)
  • Change the encoding of the filenames with convmv (files e.g. from windows).
    To preview the change do:

    convmv -f cp1252 -t utf8 *

    To do the change:

    convmv --notest -f cp1252 -t utf8 *

How does Java handle encoding?

Java is platform independent one should think, but it isn’t regarding to the encoding.

For example: if you read a file correctly under linux, this could fail if you don’t specify the encoding explicitly, because it assumes it is utf8 and under windows it will use another default!

To override the default use: ‘java -Dfile,encoding=UTF-8’ or be explicit with the encoding! E.g read characters from a stream with the following lines:

BufferedInputStream iStream = new BufferedInputStream(urlConn.getInputStream());
InputStreamReader reader = new InputStreamReader(iStream, "UTF-8");

Another issue could be Java source files. They can have different encoding. You should use UTF8, because this is the encoding Java uses for its Strings.

In NetBeans 6.1 change it in the project properties (right-click on the project->properties)->Source->Encoding

In Eclipse 3.4 go to the preferences (menu Window) -> General ->Workspace->text file encoding

But this is only useful for desktop applications like my open source timetabler. But what if you do web development? All fine there? No not really. Then you might get additional problems with url encoding or xml parsing. For the latter one the fix is simple:

  • XML: <?xml version=”1.0″ encoding=”UTF-8″?>

But for url encoding the following does not really work:

  • JSP: <%@page contentType=”text/html; charset=UTF-8″ language=”java”%>

Apropos JSP – I had an encoding issue with the request. Try the following:

<% out.print(“RESPONSE character encoding=” + response.getCharacterEncoding() + ” “);
out.print(“REQUEST character encoding=” + request.getCharacterEncoding() + ” “);
out.print(“JVM encoding ” + System.getProperty(“file.encoding”) + ” “);

//EVEN here we get request parameter in wrong encoding
bean.setRequest(request);
%>

You will see that the request is null if I am not wrong. And then Java will use utf8? NO!

It will use ISO-8859-1! Why? It is written in the standard!

A simple request.setCharacterEncoding(“UTF-8”); would help if all browsers would send its request according to the header of the jsp. But this isn’t actually working for my use case. So I grabbed the strings from the request via this helper method:

private String toUTF8(String str) {
        try {
            return new String(str.getBytes("8859_1"), "UTF8");
        } catch (UnsupportedEncodingException ex) {
            return str;
        }
}

Update 1: Read this or this to get a better workaround with a javax.servlet.Filter, webserver parameters and jsp configs.

Update 2: The following snippets could be useful if you are using maven and want to make the application UTF-8 aware:

<plugin>
<artifactId>maven-compiler-plugin</artifactId>
<configuration>
<source>1.6</source>
<target>1.6</target>
<encoding>UTF-8</encoding>
</configuration>
</plugin>

<plugin>
<groupId>org.apache.maven.plugins</groupId>
<artifactId>maven-resources-plugin</artifactId>
<configuration>
<encoding>UTF-8</encoding>
</configuration>
</plugin>

Update 3:

A good side with a lookup table for Unicode characters

http://unicode.coeurlumiere.com/

Summary

I invite you to post all your experiences with encoding problems in java.
E.g. how to force jboss or jetty to use utf8?

Why NetBeans?

Today it is time to summarize my experience with NetBeans. I am a user since version 3 (was it 3.4?) and my personal requirements increase not so dramatically like the features does in NetBeans. And so I am still a happy user.

I am not a jee developer so I can’t cover topics like JSF support, ruby or other ‘non-desktop’ features of NetBeans. For all features of the latest version please read this document.

The next points will be

My favorite features in NetBeans 6.1

  1. NetBeans is free, open source, platform independent and stable.
    There are several IDEs on the market, but Eclipse and NetBeans are open source and so they have the best price 😉
    In comparison to Eclipse NetBeans was and is ‘really’ platform independent. That means you can use the same files for windows and Linux. But that’s not all: all platforms has the same support (unlike Eclipse e.g. for Mac OS).
    The latter point (‘stable’) is not true for the early milestones. My experiences with them were really bad, but e.g. the latest version 6.1 with all updates is very mature. I use it every day without a crash so far (although memory consumption is higher compared to previous versions)
  2. NetBeans is easy.
    NetBeans is easy to install and to use. There are several download-bundles so that you don’t need to go into the plugin hell, like in other IDEs. Simply download e.g. the Java-bundle and get the rest later through the plugin manager (Tools->Plugins). The NetBeans folks offer even a version for php development, where you can debug the code! (I tried it and it works under my suse linux, but the installation procedure was ugly…)
    All common actions have a keyboard shortcut or you can create one easily. Even for your ant tasks: Just click on the node which is on the left of the build.xml file (in the files window) and right click on a task. Then ‘create shortcut’. That’s it.
    NetBeans is easy for common tasks like

    • Editing
      I think the most important feature of all IDEs is code completion. In NetBeans you can do this via CTRL+SPACE. This will complete a variable, class or method name for you. One great example is to place the cursor after
      new JFrame().addKeyListener(new Key
      and select KeyListener. This will implement the listener automatically for you.
      With NetBeans 6.0 they introduced some code quality hints: if a variable is unused, if a method should be annotated, … To perform the actions associated with the hints (a yellow bulb on the left side) just click ALT+ENTER.
      Other editing-features are: formatting xml or Java sources via ALT+SHIFT+F, fix/organize imports via CTRL+SHIFT+I, create setters and getters via ALT+INSERT, SHIFT+F10 for context menu, maximizing the editor with SHIFT+ESC, jumping to another source code (CTRL+click a method or another object; CTRL+PageUp or Down), open any file with SHIFT+ALT+O
    • Refactoring
      rename of methods, classes via CTRL+R. Change method parameters etc.
      Try it via right click into a Java source and go to Refactor.
    • Running
      just hit F6 … and choose the main application before (right click on the project->main application)
    • Debugging
      hit CTRL+F5 to start debugging. To see the value of a variable hold the mouse over it. You can even evaluate expressions: select the expression with the mouse and hold the mouse over the selection. Or the old way: go to the Watches-Window and add the expression as ‘New Watch’. Even in this ‘add-watches’ text field you can use code completion! With this feature you can change the content of a variable easily. Warning: evaluate only expression without side effects, because otherwise the evaluation will change your variables!!
      Another feature will help those people where the application startup is expensive:
      (slightly) change the code and then go to the Run-menu->Apply Code Changes and continue with the changed code.
      Conditional breakpoints are available via right clicking on the ‘breakpoint rectangle’->breakpoint->customize. Then write any expression into the enabled line for ‘conditions’.
    • Web-start-enabling
      right click on the Java-project, then properties->Application->Web Start. The last time I used this it was a bit tricky to get it working…
    • Packaging
      just hit SHIFT+F11 or clean and build to get a jar file (which is usable via ‘java -jar’) and the other libs in the dist folder.
  3. NetBeans has a lot of plugins.
    Okay, there are a lot more plugins for Eclipse, right. Right at the moment 😉
    The NetBeans community has some really cool plugins e.g. if you didn’t download the full bundle you can add the plugins easily via: Tools->Plugins. And they will work! I never failed to install a plugin. In Eclipse this was not always true.
    You should try the following plugins:

    • With the UML plugin you can create several types of diagrams. E.g. class diagrams. For those diagrams NetBeans offers a way to create them from the Java-source-files automatically.
    • Mobility plugin. Some times ago I developed mobidic (a mobile dictionary) and this even without ever having a smart Java-enabled mobile phone (using the emulator). Then I deployed the created files to a friend with such a mobile and … it worked!
      It is even possible to debug directly on the device (not only in the emulator). Read this.
    • The sqe plugin includes such great tools like findbugs, checkstyle and pmd to enhance you code quality. Go to this page to see how to install it in NetBeans.
      FindBugs is really nice, please try it and I am sure it will lead you to (at least) one bug.
    • For my TimeFinder project I use Spring Rich Client. Then I noticed that NetBeans could help even there with the Spring Rich Client plugin.
    • The Java Application framework support is a smaller project, but well integrated in NetBeans where you can easily create a desktop application (status bar, progress monitor, actions, …) within minutes. Just create a Java project and choose ‘Java Desktop Application’.
  4. NetBeans has good JUnit support.
    Default testing environment in NetBeans was and is JUnit (supported versions are 4.1 or 3.8). You can create a template JUnit-file via right clicking on the Java file->Tools->Create JUnit Tests or CTRL+SHIFT+U. I know that you should create the test before the class, but you should create the empty methods to let NetBeans create the test for you. After that write the test and make them passing (This is the way I go). NetBeans offers a nice UI to show the errors and passed tests. Click on the errors and NetBeans will guide you to the source code.
  5. NetBeans has a Java Profiler.
    Compared to Eclipse’s profiler the NetBeans profiler is faster and easier to setup (one click! really!). E.g. for a very simple project Eclipse’s profiler (within its standard settings) took 1 minute and 4 seconds. Where NetBeans profiler was ready within 4 seconds (nearly the normal execution time). I don’t want to talk about the time it requires to setup the TPTP stuff in Eclipse. The profiler for NetBeans comes with the standard Java-bundle so really no setup procedure. (To be fair: Eclipse’s profiler will be usable after some configuration.)
    With NetBeans 6.0 they introduced a new concept of profiler points, where you can define points in the source code where the profiler should do some actions (take snapshot, clear results, …). Read this for more details.
  6. NetBeans has good maven support.
    I didn’t try other IDEs with maven. In NetBeans you have to download the maven2 plugin then you will have a lot of features:

    • You can directly open any maven project. The pom.xml will be the project descriptor. So a change there will be visible in NetBeans after one second or so. E.g. if you add a new library you will see the added library in the Library node of the project window.
    • The main goals are accessible through keyboard short cuts or via mouse clicks as every other NetBeans project (clean, build, debug, run, test, javadoc)
    • ALT+ENTER on a missing class will ask if you want to search it in a maven repository and if it was found it will automatically add it to your pom.
    • A maven repository browser: Window->’maven repository browser’.
  7. NetBeans has other cool gimmicks
    • Subversion, Cvs and mercurial support; creating or applying patches etc. I personally prefer KdeSVN in combination with NetBeans subversion support.
    • Local history is a new feature introduced in 6.0. It its very handy to redo things that I changed the last week without having access to the underlying subversion – great!
    • You can create an HTML file from a Java source file (with correct highlighting). Go to File menu and click on “Print to HTML”.
    • Your translated project is just a few clicks away: Tools->Internationalization->Internationalization Wizard
    • You want to run your project with different startup parameter? Right click the project->Set Configuration->Customize.
    • Create a license header automatically for every file. (Please ask me if you need an English translation.)
    • To compare two versioned or unversioned files: select them and right click->Tools->Diff

NetBeans is not perfect

(Of course, that’s true for almost all software products)

At the moment NetBeans 6.1 does not offer:

  • An incremental compiler like in Eclipse (this will come with 6.5! and will be called compile on save)
  • A spell checker like in Eclipse
  • TestNG. This is very easy to setup in Eclipse and the hell in NetBeans.
  • Subversion client – you have to install your own command line version first.
  • Formatting of several files. E.g. via right clicking on a package->Tools->Formatting.
  • Searching through keyboard shortcuts
  • Select only some modules for the update process
  • Collect closed documents in a ‘trash’ (like in opera)
  • The collaboration plugin (Real time editing) is far from perfect. Read this for more information. Here Eclipse rocks!!

The most annoying but strangest bug for me in NetBeans is …

Some time ago I developed an QtiPlot or Origin-like application called genvlin with the NetBeans 5.0 platform. Then I discovered a really strange bug under linux with an relative old jdk:

If the user wants to select a menu item e.g. open projects he has to go some menu item below to select this item. It was strange and annoying at the same time, because in NetBeans 5.0 IDE I didn’t see this bug.

Now someone could say: time has changed and no such bug exists in 6.1.

No, thats not true!

Today I discovered exactly the same old and annoying bug in the latest IDE 6.1 (with jdk 1.6.0_06) here I captured a screenshot:

I simulated the mouse pointer with a red dot. In 5.0 it was even worse: the mouse sometimes was several pixels below this point!

I don’t fake it. Believe me! (Does anybody know how to capture screenshot with mouse pointers under linux?) You can trust that I didn’t fake the image, because then I captured another interesting screenshot:

Which might be a solution to the problem: the JPopupMenu (I guess menus are implemented in this manner) is shown at the wrong position.

Has anybody seen the same bug, too??

It is really difficult to reproduce. Sometimes it occures and sometimes not…

E.g. I restarted NetBeans and it disapears.

Please look here for the bug report at netbeans.org.

UPDATE = PARTIAL SOLUTION

Today (19.08.08) it was the first day I see this behaviour in another java application.
(The popupmenu selection was different to the mouse position)
So I guess: its not a netbeans issue!!

UPDATE2

You can stimulate this bug via:

click “restore old size” in the menubar (WindowMaker) of the window of Netbeans -> move the window a bit left (out of screen) -> maximize -> now e.g. right click a project => context menu => bug

Spring DI via Java configuration. No XML!

In picocontainer you have only one option: configure your beans with pure Java code. Thats what I want. Because it is type safe and all major IDE will easily refactor this code later if necessary.

Then, with nanocontainer, it is even possible to write the configuration code in scripting languages.

In Spring you normally hook up your dependencies in an xml file. This is okay as long as you learn this ‘xml’. So, I looked around if there are alternatives to xml.

Here are the results:

Deploy file to Sourceforge with an ant task

After studying the workaround I can now deploy a file to my sourceforge directory. Now I don’t need to upload the file manually with konqueror’s fish protocol.

Just copy the jsch jar version 0.1.29 (!) to ANT_HOME/lib and use the following ant target.

    <target name="deploy-all" description="deploys timefinder for users and developers" depends="-init-deploy">
        <zip basedir="${basedir}/.."
             destfile="${release.file}"
             compress="true"            
             casesensitive="true"
             duplicate="fail"
             whenempty="fail">
            <patternset refid="pkg-all"/>
        </zip>
        <scp file="${release.file}" todir="${username}:${password}@frs.sourceforge.net:uploads/" />
    </target>      

Now invoke ant via:
ant deploy-all -Dusername=yourusername -Dpassword=yourpassword

Please keep in mind that this is not so secure, because other user could see the password with the unix command ps. See the security notice here.

Spring Rich Client – Part 2

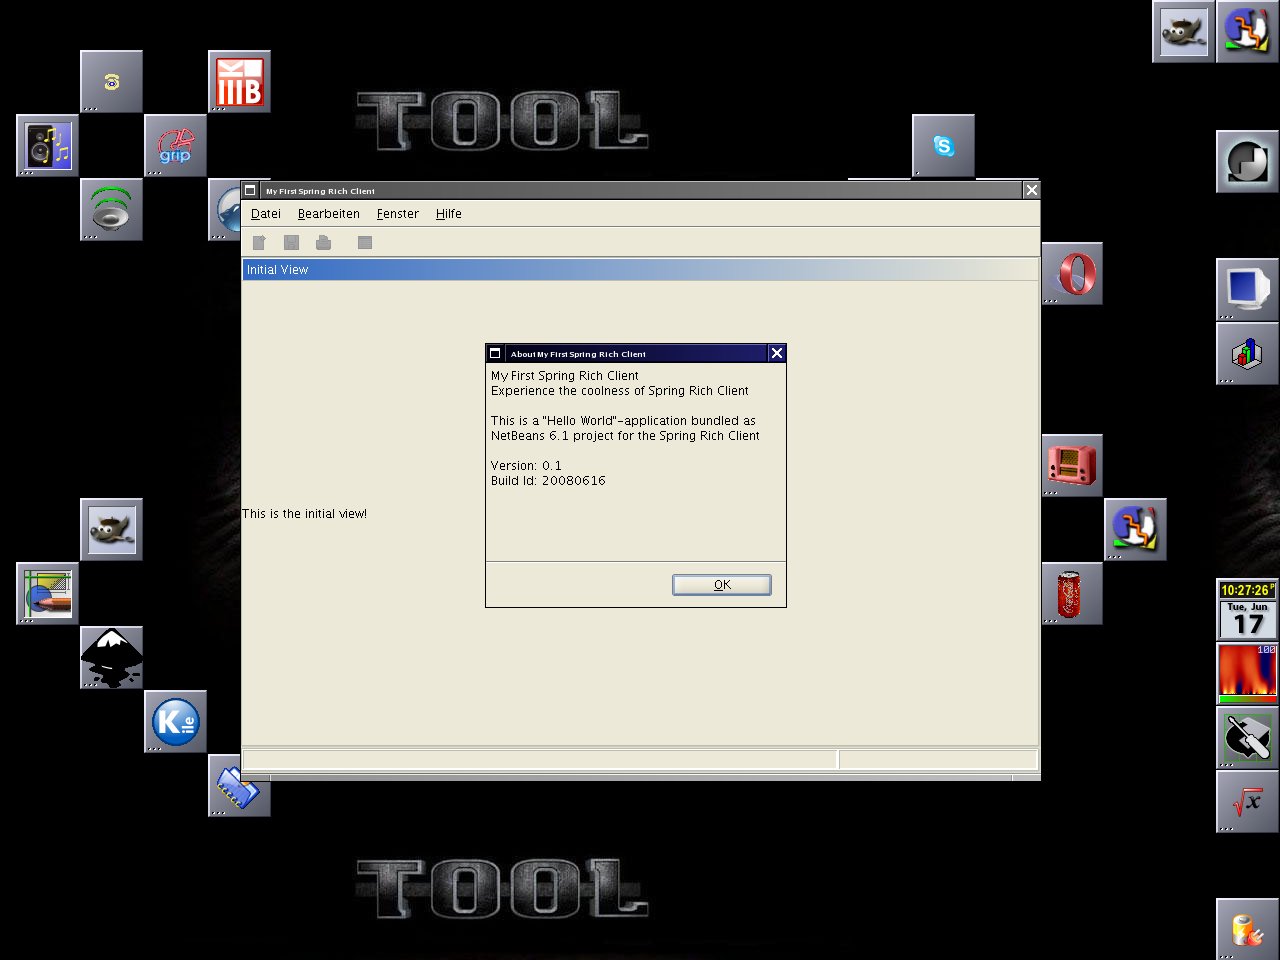
Let us do some more basics with the “Spring Rich Client” 1.0.0 (SpringRC). Although it is time to give an overview of the entire architecture I won’t do this here, because I am a newbie with Spring and SpringRC. So we will just look into the steps how we get things running.

Update: See an older post for a good intro or this link collection for more information.

Startup

First of all we want to include a license prompt on the very first startup. If it is in pure text format surround the license with <pre>licenseText</pre>, save it to the classpath as /path/license.txt and do the following:

  • Add the source code into LifecycleAdvisor
        private final Log logger = LogFactory.getLog(getClass());
        private static final String SHOW_WIZARD_KEY = "setupWizard.show";
        private Settings settings;
        @Override
        public void onPreStartup() {
            boolean showDialog = true;
            if (settings.contains(SHOW_WIZARD_KEY)) {
                showDialog = settings.getBoolean(SHOW_WIZARD_KEY);
            }
            if (showDialog && getApplication().getApplicationContext().containsBean("setupWizard")) {
                SetupWizard setupWizard = (SetupWizard) getApplication().getApplicationContext().getBean(
                        "setupWizard", SetupWizard.class);
                setupWizard.execute();
                settings.setBoolean(SHOW_WIZARD_KEY, false);
                try {
                    settings.save();
                } catch (IOException ex) {
                    logger.error("Can't save state.", ex);
                }    }    }
        public void setSettings(Settings set) {
            settings = set;
        }
  • Add the following text into the application-context.xml
    <bean id="setupWizard" class="org.springframework.richclient.application.setup.SetupWizard">
        <property name="licenseTextLocation" value="/path/license.txt" />
    </bean>
    <bean id="xmlInternalSettings"
          class="org.springframework.richclient.settings.xml.XmlSettingsFactory"
          factory-bean="settingsManager"
          factory-method="getInternalSettings">
    </bean>
    <bean id="settingsManager" class="org.springframework.richclient.settings.SettingsManager">
            <property name="settingsFactory">
                <bean class="org.springframework.richclient.settings.xml.XmlSettingsFactory"/>
            </property>
    </bean>

    And insert <property name=”settings” ref=”xmlInternalSettings” /> into the lifecycleAdvisor bean’s property list.

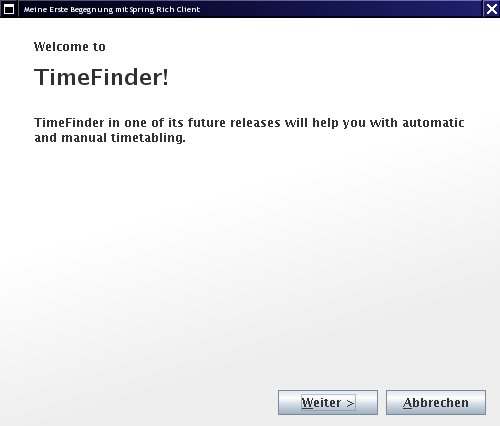
  • As last step you have to fill in the message text for this wizard into the message.properties file:
    setup.intro.welcomeTo = Welcome to
    setup.intro.title = TimeFinder!
    setup.intro.description = TimeFinder in one of its future releases will help you with automatic and manual timetabling.
    setup.cancel.title=Cancel Setup
    setup.cancel.message = Do you really want to exit the application?
    acceptLicenseCommand.label=I &accept the terms of this license agreement
    doNotAcceptLicenseCommand.label=I do ¬ accept the terms of this license agreement
    setup.license.title=License agreement
    setup.license.description=Please read the following license agreement carefully

The most of the xml code above is necessary to inject a new instance of Settings which will be created from the SettingsManager.

… Break …

Does anybody of you know, how I can do this in Java, not in ugly xml? Well, I could create the factory directly in the LifecycleAdvisor, but how can I do this dependency injection in Java (with Spring)?

… Okay, let us go further …

This settings object is then accessible within the LifecycleAdvisor because of the setSettings method and is necessary to save, if this wizard should be prompted on the next startup again. The xml-settings will be written to currentPath/settings/internal.settings.xml.
The used SetupWizard extends from AbstractWizard. This abstract class could be used for any other wizards: just add one or more AbstractWizardPages to the wizard and see this documentation. Here is the result:


Another cool feature is to show a progressbar on the splashscreen. This was very easy: add (or replace the existing) bean to the startup-context.xml file:

<bean id="splashScreen" class="org.springframework.richclient.application.splash.ProgressSplashScreen" scope="prototype">
        <property name="imageResourcePath" value="/de/peterk/springr/ui/images/splash-screen.png" />
        <property name="showProgressLabel" value="true" />
</bean>

Now I did an ugly hack. I want to change the colors of the progressbar. But only on the progressbar on startup, so we have to revert the following code:

Color myYellow = new Color(255, 225, 100);
Color myGreen = new Color(120, 208, 60);
UIManager.put("ProgressBar.selectionForeground", myYellow);
UIManager.put("ProgressBar.selectionBackground", myGreen);
UIManager.put("ProgressBar.foreground", myGreen);
UIManager.put("ProgressBar.background", myYellow);
UIManager.put("ProgressBar.border", new LineBorderUIResource(myYellow));

To revert these changes, please look into the method LifecycleAdvisor.onPreWindowOpen (see the resources section, I will not post it here – it is too stupid ;-))

Here is the result:

Views …

Hopefully I can create a next blog entry about the docking framework MyDoggy and the integration into SpringRC. Now it works like a charm – try it out! (see resources).

Today I will show what you can apply to all ‘component managers’ that are integrated in SpringRC.

First: there is one application per virtual machine. But there could be one or more ApplicationPages (JFrames) with several views (center, north, south, …). In our case (MyDoggy) there is only one ApplicationPage.

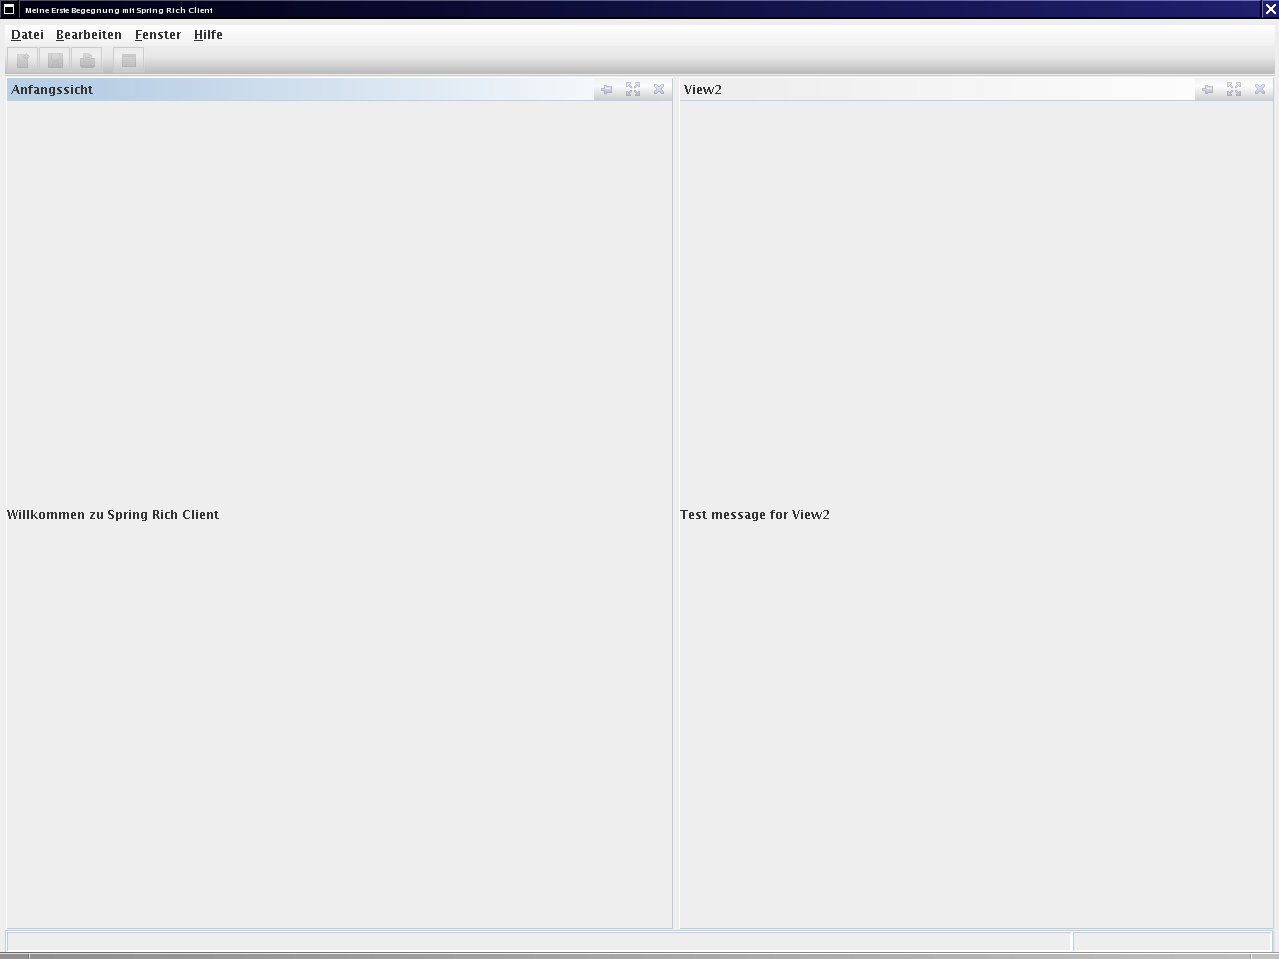
Normally you want to have more than one component per start-up page. To change this add the following xml to the application-context.xml:

<bean id="aLotOfViews" class="org.springframework.richclient.application.support.MultiViewPageDescriptor">
   <property name="viewDescriptors">
     <list>
        <value>view2</value>
        <value>initialView</value>
     </list>
   </property>
</bean>

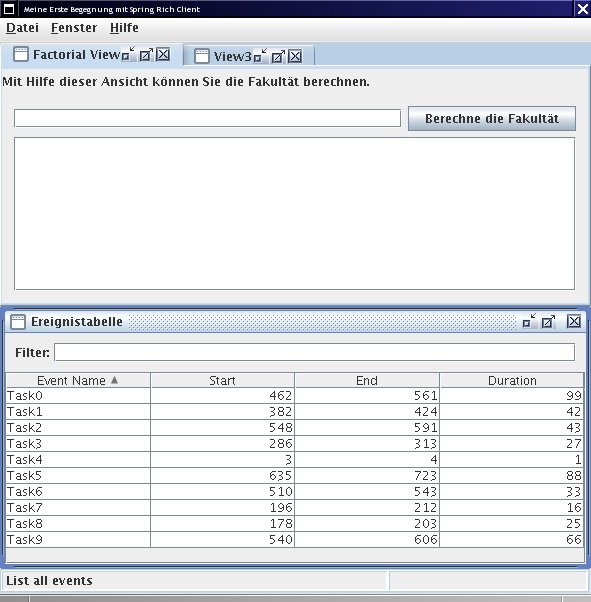
And change the startingPageId in the lifecycleAdvisor bean to aLotOfViews. With the upcoming MyDoggy 1.5.0 enabled we can get this nice layout, which will be automatically saved(!):

Of course it is possible to use other layout manager like swing dockings:

… and more!

If you want to use custom components: just add them! I created a custom component with the open source Matisse GUI builder integrated in NetBeans. Here is the code how you can put this component into SpringRC:

public class CalculatorView extends AbstractView {
    protected JComponent createControl() {
        JPanel panel = getComponentFactory().createPanel(new BorderLayout());
        panel.add(new CalculatorPanel()/*created with Matisse*/, BorderLayout.CENTER);
        return panel;
    }}

To add this view to the startingPage do (aLofOfViews already references to this bean, so no changes are necessary there):

<bean id="view2" class="de.timefinder.core.ui.mydoggy.MyDoggyViewDescriptor">
        <property name="viewClass" value="de.timefinder.core.ui.CalculatorView" />
</bean>

One thing you have to know is: How to translate keys within this ‘external’ CalculatorView?

In Matisse do:

  1. Click the button, where you want to translate the text
  2. Then – in the property panel on the right side – click on the […] button
  3. Select “Resource Bundle” instead of “Plain Text”
  4. Use the messages.properties file for the bundle name
  5. Insert the appropriate key (defined in messages.properties)
  6. Use the following line to get the value (click on the “Format…” button) Application.instance().getApplicationContext().getMessage(“{key}”, null, null)

For all of the following components it is easier: do 1, 2, 3 and insert the key! This could be the new slogan for Matisse 😉

Now some more I18N. For example you want to display: “Result of $number!” you should use the following line in message.properties:

calculatorPanel.title=Result of {0} !

and get the formatted string via

Application.instance().getApplicationContext().getMessage("calculatorPanel.title", new Object[]{result}, null);

Another small point could be the ugly output of the standard java 1.4 Logger. We will now change the two-lined logging output into a one-lined. Actually this is a one-liner if you look for yourself into the resource section for the TFFormatter class:

java.util.logging.Logger.getLogger("de.timefinder").getParent().getHandlers()[0].setFormatter(new TFFormatter());

Tasks

In Swing you can use the Swing ProgressMonitor, but in SpringRC you should use the integrated ProgressMonitor to indicate the current progress of a task in the bottom right corner of the page:

With the factorial view of my example you can calculate, yes, factorials. I tried “50 000” and the calculation took nearly the same time as adding the number to the JTextArea …

So, use the ProgressMonitor in combination with the SwingWorker (I grabbed it from jdesktop, but you can use SpringRC’s Swingworker as well. Get the concurrent package from here or through maven. )

Now you can use the following code to execute a long running task:

ApplicationWindow aw = Application.instance().getActiveWindow();
final ProgressMonitor pm = aw.getStatusBar().getProgressMonitor();
String str = Application.instance().getApplicationContext().getMessage("calculatorPanel.startTask", null, null);
pm.taskStarted(str, -1);
SwingWorker sw = new SwingWorker() {
        BigInteger resultLong = BigInteger.ONE;
        //protected Object construct() in SpringRC's SwingWorker!
        protected Object doInBackground() {
            // now my long task and the progress indication
            for (int i = 2; i <= fac && !pm.isCanceled(); i++) {
                pm.worked(100 * i / fac);
                resultLong = resultLong.multiply(BigInteger.valueOf(i));
            }
            return resultLong;
        }
        //protected void finished()
        @Override
        protected void done() {
            // all of the following code will be called on the Event Dispatching Thread
            if (pm.isCanceled()) {
                output.setText("Canceled");
            } else {
                output.setText(resultLong.toString());
            }
            pm.done();
        }
    };
    //sw.start();
    //sw.clear(); // reuse would be possible with SpringRC's SwingWorker!
    sw.execute();

Conclusion

SpringRC offers us – as client-side-programmers – a bunch of powerful utilities to build our application fast and scaleable. Some parts are well documented; some parts not. But I think with relaunching the project in October ’08 (hopefully!) as Spring Desktop it will get a lot of support from even more users and maybe from the company SpringSource itself. Hopefully then the documentation will be better…

The most important point for me is that SpringRC is ‘only’ a sweat jar collection and not a layer between me and Swing.

Another point is that SpringRC uses dependency injection and NetBeans RCP uses the service locator approach e.g.
SomeInterfaceImpl impl = Lookup.lookup(SomeInterface.class).
instead of the setter injection in the very first example for SpringRC.
For others this could be one more argument against NetBeans RCP (not for me …)

Resources

  • Another older, but very good tutorial is located here.
  • Maybe it is interesting to know: in the updated version of the book Spring – A Developer’s Notebook the last chapter 9 is about the Spring Rich Client Project (author was Keith Donald).
  • Here you can find part 1.
  • Here you can download the project without the jars included in the SpringRC’s download (It is a NetBeans 6.1 project, so you can simply copy all jars of SpringRC into the lib folder and open the project with NetBeans. Then resolve references via right click or change the references directly; in nbproject/project.properties).
  • Update: Other resources can be found here.

Dependency Injection – 3 Questions!

Normally the reason why I write blogs is to inform other people about interesting things I found or I am thinking about. Today I will ask some questions and wait for your answer 😉

One of my latest posts was about the spring rich client. Because of this project and picocontainer I read a lot about design patterns. The most obvious design pattern in spring is called dependency injection. This design pattern helps the software architect to loosly couple components. It could work like follows (just for the JSE-developers under us):

class ClassA {
MyInterface objectA;
public void setMyInterface(MyInterface objA) {objectA = objA;}
}

where we could have defined the interface like this:

interface MyInterface{ String toString(); }

Now, ClassA defines a dependency on an instance of MyInterface and the framework (for Java e.g. picocontainer, spring, juice or others) will inject an instance of an implementation of MyInterface into ClassA. It is up to the configuration if objA is a newly created instance or if it is a ‘singleton’. (MyInterface could be a class as well.)

For example if you call

ClassA classA = framework.getBean(ClassA.class); //code is similar to picocontainer; not to spring!

You will get back an instance of class ClassA, where objectA is not null! The dependency was defined by the method (setMyInterface) – this is called setter injection. Other kinds of injections are:

  • annotation-based injection:
    class ClassA { @Inject Object objectA; }
  • constructor injection:
    class ClassA { Object objectA;
    public ClassA(ObjectA objA) {objectA = objA;}
    }

Where picocontainer campaigns for constructor and spring for setter injection (but both projects offer at least the mentioned kinds of injection).

It is correct that you can create your own small framework or even set up the objecs by hand to achieve the same: dependency injection. But I guess you are lazy and will choose one of the open source frameworks.

Now, all is explained to understand my 3 questions. Hopefully someone out there will have an answer!

1. How should I design a library?

Let me explain. You want to sell a nice designed, but complex library. The library offers a lot of functionality and you want to split it into loosly coupled components. That means you have to use dependency injection (DI), but you don’t know if the customer has or wants such a DI-framework.

So, if you use e.g. the annotation-based injection it would be nearly impossible for the customer to use your library; with setter or constructor injection it is quite difficult to set up the objects for using your library.

I don’t know what to do: Should I really use dependency injection here? Or should I use a (dynamic) service locator instead; to decouple my components within the library?

Martin Fowler says:

“It (dependency injection) tends to be hard to understand and leads to problems when you are trying to debug. […] This isn’t to say it’s a bad thing, just that I think it needs to justify itself over the more straightforward alternative (service locator).”

A common reason people give for preferring dependency injection is that it makes testing easier. The point here is that to do testing, you need to easily replace real service implementations with stubs or mocks. However there is really no difference here between dependency injection and service locator: both are very amenable to stubbing. I suspect this observation comes from projects where people don’t make the effort to ensure that their service locator can be easily substituted.

“So the primary issue is for people who are writing code that expects to be used in applications outside of the control of the writer. In these cases even a minimal assumption about a Service Locator is a problem.”

So: What would you do? Would you use a service locator or dependency injection inside the library?

And this leads me to the next important question:

2. Why is a singleton an antipattern?

I stumbled over this question while I used picocontainer. They say you have to avoid singletons, because it is difficult to test and to replace. My question is: why? Imagine the following singleton:

class LogFactory{
public static Logger getLogger(Class clazz) { … }
}

Now it is really easy to replace the implementation of the Logger interface e.g. if one defines a setImpl method:

LogFactory.setImpl(LoggerForTesting.class);

So what’s soo wrong with a singleton?

3. How can I avoid making all classes public?

I don’t know if it is the case for autowiring in spring. But in picocontainer you have to set-up the configuration for the wiring of the classes by yourself e.g. in a separate class (with Java; no xml! compiler checks references! yeah!) or in a separate file with a scripting language (or xml) and nanocontainer. That means you could specify the implementations of the interface by:

framework.setImpl(MyInterface.class, FirstImpl.class);

But wouldn’t it mean that I have to add the modifier public to the class FirstImpl? (To let picocontainer call the default constructor.) This can’t be good design to allow the user of my library to see the implementations of MyInterface.

Whats wrong with my use case and my conclusion?

C# 4 Java Programmers

“Today” I learned C# and I will post some intersting facts about Java and C#. But please, this is just a draft. Maybe this wikipedia article is a better place for you.

And please correct me, if I posted mistakes or invalid facts about C#. Or if you missed a great feature of C# or an example of the facts, then please let me know.

Basics

  • All .NET languages are compatible to each other. I know that there are now some more languages for the jvm, but the jvm was published with only one language: Java.
  • package in Java will be namespace in c#; the root is “System”
  • style convention: a method starts with upper case: Method()
  • System.out.println(String) will be Console.Write(“Hello {0}!”, name);
  • Java String = c# string or String
  • Java Object = c# object or Object
  • Java boolean = c# bool
  • all types are objects (even Java primitives)
    e.g. if you write int in c# the class Int32 will be used
    the ‘c# primitives’ extend ValueType
    struct’s and enum’s are value types too
  • Unboxing: intVar = Convert.ToInt32(obj);
  • for enums only byte, short, long and int are valid (no string!)
  • int intDigit = Convert.ToInt32(Console.ReadLine()); //similar to Integer.parseInt(String); in Java
  • check arithmetic over- and underflows:
    long lngVariable = 235235252525L;
    int byteVar = checked((int)lngVariable); // raises an exception if var is not in bounds and even “checked { block; }” is possible or set properties in project->properties->Build->Advanced->Check for arithmetical….
  • more dimensional arrays in c# looks like:
    int[,] zelle = new int[4,3];
    int[,] point = new int[,]{{1,2,3},{4,5,6}}
    int[,] point = {{1,2,3},{4,5,6}}
  • the main method in C# is: static void Main(string[] args) //case sensitive!
  • Where we write in Java: for(int tempElement : intArr){block};
    we will do the same in c#: foreach(int tempElement in intArr){block};
    c#: foreach(Object tempElement in objArr){block}; //tempElement can be changed!
  • change the standard “call by value” on value types:
    call a method by: TestProc(ref intVar);
    or define a method by: TestProc(ref int intVar);
    (similar to “ref” is “out”; used to get several results from a method)
  • Java’s varargs “…”: public void sum(Integer… args) {}
    c#’s params: public long Sum(params int[] args) {}
  • operator overloading:
    public static FloorDouble operator + ( FloorDouble fd1, FloorDouble fd2 ) {
    return new FloorDouble( fd1.Value + fd2.Value );
    }
  • c# cloning: protected Object MemberwiseClone(); or via ICloneable
  • The relationship ‘has a’ in c# is really easy:
    class ClassA { private ClassB myObj; public ClassB MyObj { get {return myObj;} }}
    or e.g.: private int age;
    public int humanAge { get { return age; } set { age = value;} }
  • Java annotations = c# attribute
  • Java native = c# unsafe (you can use fixed, *pointer, ∫, a->b, … within c#!)
  • verbatim strings begin with the special character @. Please see this doc.
    string c = "hello \t world";               // hello     world
    string d = @"hello \t world";               // hello \t world
    string g = "\\\\server\\share\\file.txt";   // \\server\share\file.txt
    string h = @"\\server\share\file.txt";      // \\server\share\file.txt

Object Oriented Programming

  • sealed in c# means final class in Java
  • you can split sources in c# over several source files with the partial keyword
  • method modifier:
    Java public = c# public
    Java private = c# private or without modifier
    Java protected = C# protected
    Java without modifier = ?
    C# internal = a member is accessible from the entire assembly.
    All the objects you define inside a .cs file (you can define more than one object
    inside the .cs file, unlike Java, where you can usually define only one object) have a handle to the internal member.
    C# protected internal – think of this one as the union of protected and internal,
    as the item is is modifying is either protected or internal. This item can be
    accessed from the entire assembly, or within objects which derive from this class.
  • class modifier:
    Java public = c# public
    Java private = c# internal or without modifier
  • All methods in a c# objects are “final” by default.
  • Java @Override = c# override (different behaviour if the super method is virtual or not!)
  • c# readonly is more or less final keyword for a variable in a Java object
  • c# const is more or less final keyword for a variable in a Java class
  • c#’s ‘extend’: class ClassA : SuperClassA
  • constructor chain in c#: Line(double X) : this(X) {}
  • Java super = c# base
  • method hiding:
    class ClassA { public void TestMethod() { Console.WriteLine(“ClassA.TestMethod()”); }}
    calling ClassB.TestMethod() results in calling ClassA.TestMethod()!
    class ClassB : ClassA { private new void TestMethod() { Console.WriteLine(“ClassB.TestMethod()”); }}
  • Java instanceof is c# is: if(myObj is ClassA) {}
  • static constructor
    Java: class ClassA{ {/*here*/}}
    c#: class ClassA{ static ClassA() {/*here*/}}
  • function pointer in c#: public delegate void MyDelegate(int value1);
  • anonym method in c#: MyDelegate del = delegate(int value1) { return value1; };
    call via e.g.: del(123);
    keyword “event” in c#: public event MyDelegate MeasureError;
    (same as the listener concept in Java)
    to add a listener use: object.MyDelegate += new MeasureErrorEventHandler(MyError);
    cannot be used from a child class!
  • Java final method = c# sealed method

Generics

In c# we have real generics, with separate namespace: System.Collections.Generic (instead System.Collections)

For a direct comparison of these two packages, please visit this page of galileo computing and go to the chapter 7.4.8.

But it seems to me the Java collection API has some more Classes, e.g. today I missed a Set. Okay we can simulate it via a SortedList<Key, Value> …

  • use return default(T); to return 0 or null, because T could be a reference or a value type
  • System.Nullable<T> now we can nullable even value types! (Nullable.HasValue)
    usage: int? intVar;
  • C# IList<T> interface will be implemented by the generic type: List<T> (no generics: Array and ArrayList). Only Array allows arrays that are not zero-based.
  • (in Java it is the List<T> interface with ArrayList<T> and LinkedList<T> as implementations)
  • C# ICollection<T> interface: LinkedList<T> (doesn’t implement IList!?), Queue<T> and Stack<T> (no generics: Queue and Stack)
  • (in Java it is the Collection<T> interface)
  • C# IDictionary<K,V> interface: Dictionary<K,V> and SortedList<K,V> (no generics: Hashtable and SortedList)
  • (in Java it is the Map<K,V> interface)
  • C# abstract KeyedCollection<K,V> behaves like a dictionary and a list at the same time. Thats great!
  • Sort an array via:
    ArrayList list = ArrayList.Adapter(array);
    class Sorter : IComparer { public int Compare(object a, object b) {return 0,1,-1}}

    list.Sort(new Sorter());
  • C# has the keyword yield, which is useable if you implement IEnumerable. E.g.: IEnumerator GetEnumerator() {
    for(int i = 0; i < months.Length; i++) { yield return month[i]; }}

Some other ‘array’ classes

in C#: there is a BitVector which is variable in length and allocated on the heap (BitVector32 has only 32 bits and allocated on the stack, so its faster.)

In Java there is similar class BitSet.

IDE

  • add an existing project to the explorer: right click the explorer-> add->existing item
  • Quick Fix via: click on the small icon which pops up if you go with the mouse to an underlined error
  • in NetBeans: create a new class; extend it with the JPanel class -> not editable via visual editor
  • BUT in Visual Studio: new Class; extend it with the Panel class -> editable via DnD !!
  • There is a very small ‘button’ in the top right corner of every editor: You can drop it down and this will result in two views (horizontal splitted editors) of the current source file!
  • TODO: add more features that I found

Conclusion

What’s better in Java?

  • free (Open Source) and fully functional Virtual Machine
  • free (Open Source) and fully functional class library
  • free (Open Source) and fully functional IDE’s: netbeans, eclipse
  • mass of open source libraries
  • platform independed! (I know there is Mono, but when was the last time you tried to run the Visual Studio on Mono? And then look at Java: Eclipse, NetBeans, etc – all will run at least on linux and windows!)

Although I love Java there are really cool things in C#:

  • real generics!
  • instead setter/getter you can use label1.Text = “Test1”; (Accessors? )
  • XmlSerializer
  • linq
  • it is possible to overload operators
  • you can use string in switch statements!
  • you can use goto to escape from nested if statements!

Feel free to post your experiences with C#!

Resources

English documentation:
http://msdn.microsoft.com/en-us/library/ms228358.aspx

German documentation:
http://www.galileocomputing.de/openbook/csharp

Real Time Editing with Eclipse and NetBeans

Do you know what real time editing is?

No, then look at this fantastic video to see this feature in Eclipse.

Or browse through this tutorial. It is really great.

I love NetBeans. So is there something similar for NetBeans? Yes! There is a collaboration plugin, but I tried it for myself and, sorry, it is really bad.

Update: You need a private server and then it should work

Here you have my bug list:

  • if I remove a contact, it will be listed the next login
  • if a disconnection happens then one can choose ‘don’t show this dialog again’. This does not work

So the previous bugs are not bad. But then when I tried it with a developer (of timefinder.de) it is only useable for a normal chat, because:

  • the editor will not being updated (after some minutes)!??
  • if you remotely execute the program you will do it several times, because you won’t get a feedback, wether starting was successful. thats awful.

But please proof me wrong and contact me via

  • Install the Developer Collaboration plugin in NetBeans 6.1 via: MenuBar->Tools->Plugins
  • Follow this collab-instructions. It is important to use the server: share.java.net and then add timefinder or peatar to your conversations.

Spring Rich Client – Part 1

Today I will start a series about the great Swing framework called Spring Rich Client (SRC). The 1.0.0 version was released in March 2008 and it is not inactive as I thought before.

You can get more information about SRC from:

Why I listed the forum as the first point? Because for a beginner like me it was the best source of information (after the samples).

So, let us set up a hello world example.

  • Download the Spring Rich Client 1.0.0 from here (19 MB, Apache License 2.0).
  • Download my Hello World skeleton (a NetBeans 6.1 project, 60 KB) or use the spring-richclient-archetype from the download bundle of SRC, where you have to install maven before you can compile and run it.

If you use my Hello World skeleton you should open it in NetBeans, right click on the project node and resolve reference problems. Then go to the place where you have unzipped the SRC and add the first jar file. The other jar files should be added automagically for you.

The project with dependencies would be about 2.7 MB, it is not a small overhead, but okay, I think. As an example for the reader one can compare it to the minimal size of the NetBeans or Eclipse RCP.

Now it is time to start the project with F6 or Run->’Run Main Project’. You should see the frog-splashscreen and the final view:

Now let me explain several things that one could customize in SRC. Please see the Resources section for the result of customization.

As the first point I wanted to know how easy it is to introduce docking capabilities (vl docking). It was really easy!

  • add spring-richclient-docking.jar and vldocking.jar
  • and change 2 things in the richclient-application-context.xml file:
  • change class of initialView to org.springframework.richclient.application.docking.vldocking.VLDockingViewDescriptor
  • add a applicationPageFactory to the richclient-application-context.xml

Then you can add a new window to see the results of dragging:

  • Create the class View2
  • add the following to the richclient-application-context.xml:
  • <bean id=”view2″
    class=”org.springframework.richclient.application.docking.vldocking.VLDockingViewDescriptor”>
    <property name=”viewClass” value=”de.peterk.springr.View2″ />
    <property name=”autoHideEnabled” value=”true” />
    <property name=”closeEnabled” value=”true”/>
    </bean>
  • and you are done! Just start the application go to Windows->Show View->View2

Now,

how easy is it to use your own layout? Configuring the look and feel:

  • Remove the lookAndFeelConfigurer and add instead:
    <bean id=”lookAndFeelConfigurer” class=”de.peterk.springr.ui.KunststoffConfigurer”></bean>
  • remove looks.jar: 350 kb
  • add kunststoff: 17 kb
  • add the KunststoffConfigurer class to the source package

Okay, then changing the splash screen is trivial: just overwrite the splash-screen.png or change the path in the richclient-startup-context.xml file.

Now we should adjust the size of the view, this can be done with 2 lines in the method SimpleLifecycleAdvisor.onPreWindowOpen:

Rectangle rect = GraphicsEnvironment.getLocalGraphicsEnvironment().getMaximumWindowBounds();
configurer.setInitialSize(new Dimension(rect.width, rect.height));

And to translate the messages simply copy all property files to e.g. file_de.properties and translate them! In our case it means “cp message.properties message_de.properties”. If you want to add a translateable tool tip of the initalView-label just use:

  • lblMessage.setToolTipText(getMessage(“initialView.toolTip”));
  • in InitialView.createControl and add the property initialView.toolTip to the property file.

To set a keyboard shortcuts e.g. to leave the application. You need to add one line to the message.properties file

  • exitCommand.label=Exit@ctrl Q

Another interesting action (in SRC they will be called commands) could be restart. So how can we add the action into the menu? You have to add

  • restartCommand.label=Restart@ctrl R
  • in the message.properties file and use
  • Application.instance().start(); Application.instance().getActiveWindow().close();
  • within your RestartCommand class. Then add
  • <bean class=”de.peterk.springr.RestartCommand” />
  • into the commands-context.xml (e.g. after <value>propertiesCommand</value> in fileMenu)

The final result is:

Resources

Here you can download the extended “hello more” sample (a NetBeans 6.1 project about 90 KB, without dep). The full project was 2.9 MB.

Conclusion

One can say that Spring Rich Client is a powerful jar collection :-). But I would say SRC is a great way for your next swing application!

It is very intuitive to use: the whole sample (including to write this blog) took me only about 6 hours. I think you could be really productive with it! In the case I published the documents with mistakes: please leave your comment here!